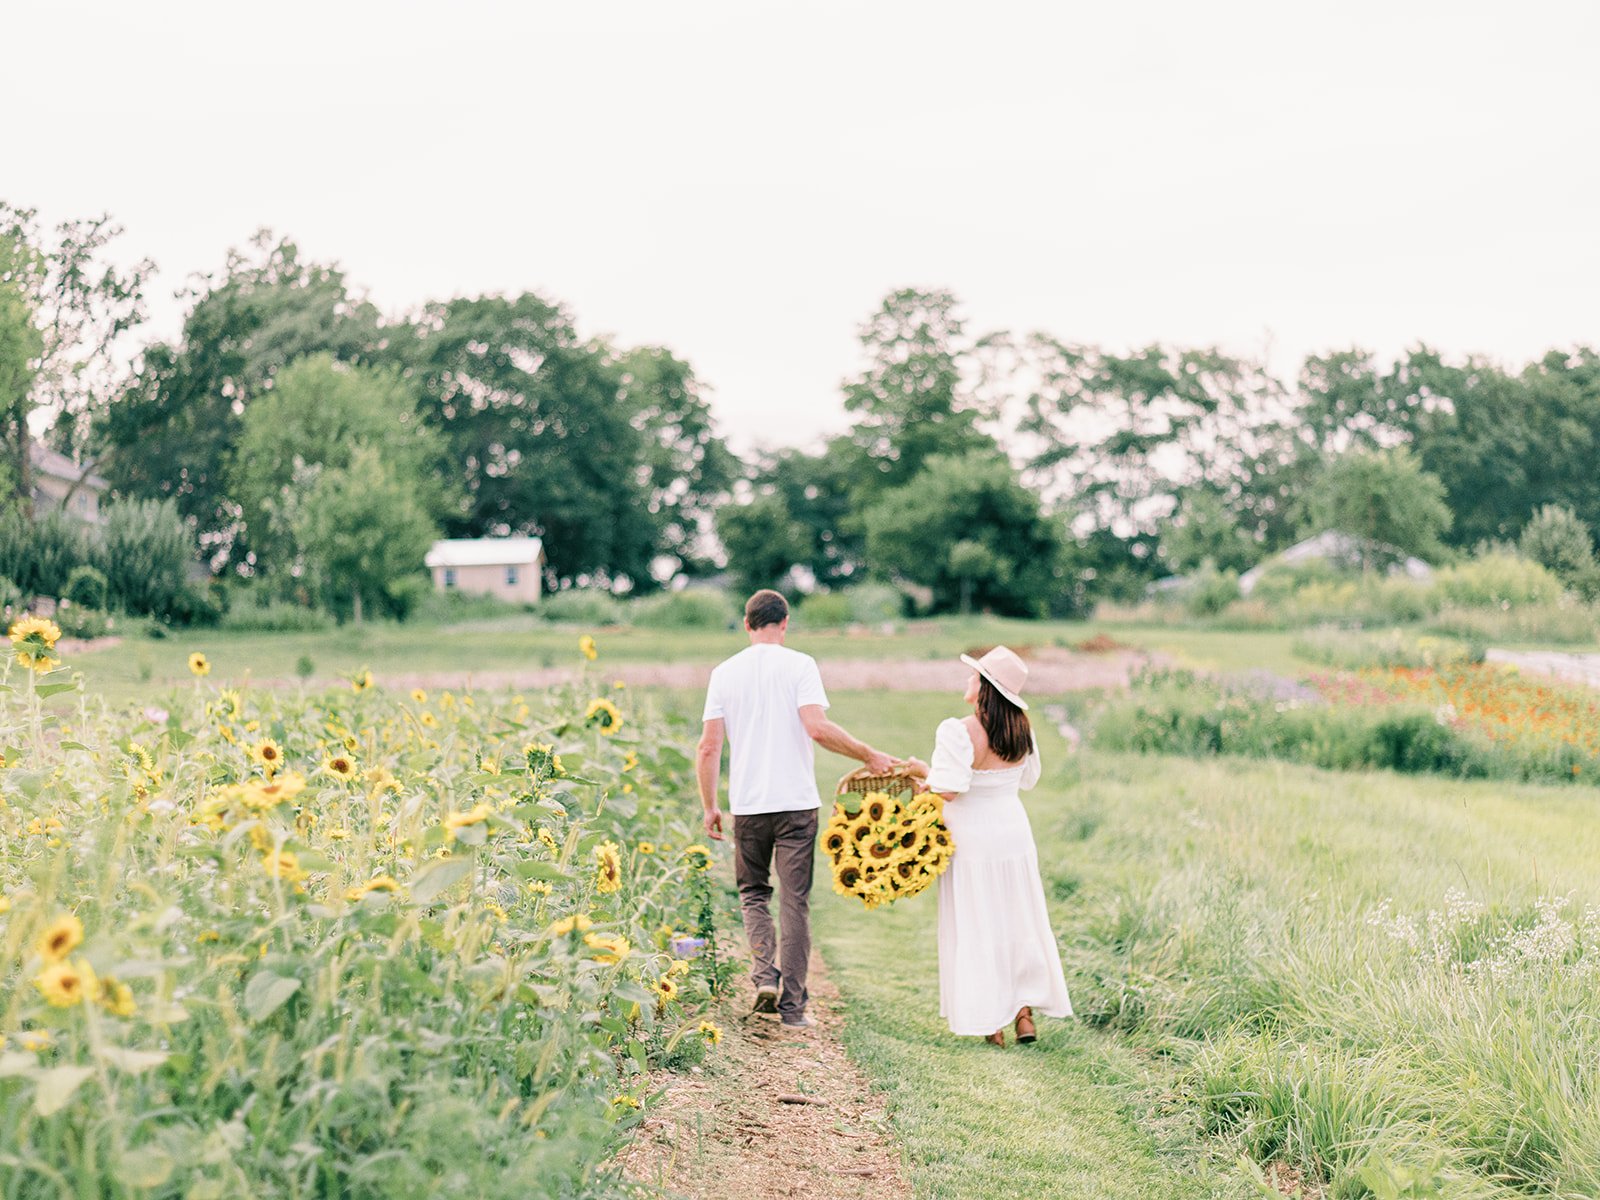
The Best Flowers for Container Gardening
Container gardening is a great way to bring color and beauty to your outdoor space, even if you don't have a lot of room or soil to work with. But with so many different types of flowers to choose from, it can be overwhelming to decide which ones are the best for container gardening. Here are some easy tips for selecting the best flowers for your container garden!
Choose flowers that are suitable for your climate and growing conditions. Different types of flowers have different temperature and light requirements, so it's important to choose flowers that will thrive in your specific location.
Consider the size and growth habit of the flowers. Make sure to choose flowers that will fit in the size and shape of your containers, and that won't outgrow their space too quickly.
Choose flowers that have a long blooming season. This will help to keep your container garden looking vibrant and colorful for longer. Some good options include annuals, such as petunias or marigolds, or perennials, such as daisies or black-eyed susans.
Select flowers that are low maintenance. Container gardens can require a bit more attention than in-ground gardens, so it's important to choose flowers that are easy to care for. Some good options include succulents, herbs, and hardy annuals.
Don't be afraid to mix and match. One of the great things about container gardening is that you can get creative and mix and match different types of flowers to create a unique and beautiful display. Just make sure to choose flowers that have similar growing requirements.
We hope these are helpful to y’all when trying to find plants that work best in containers. Happy gardening!
XX Jenn + Adam
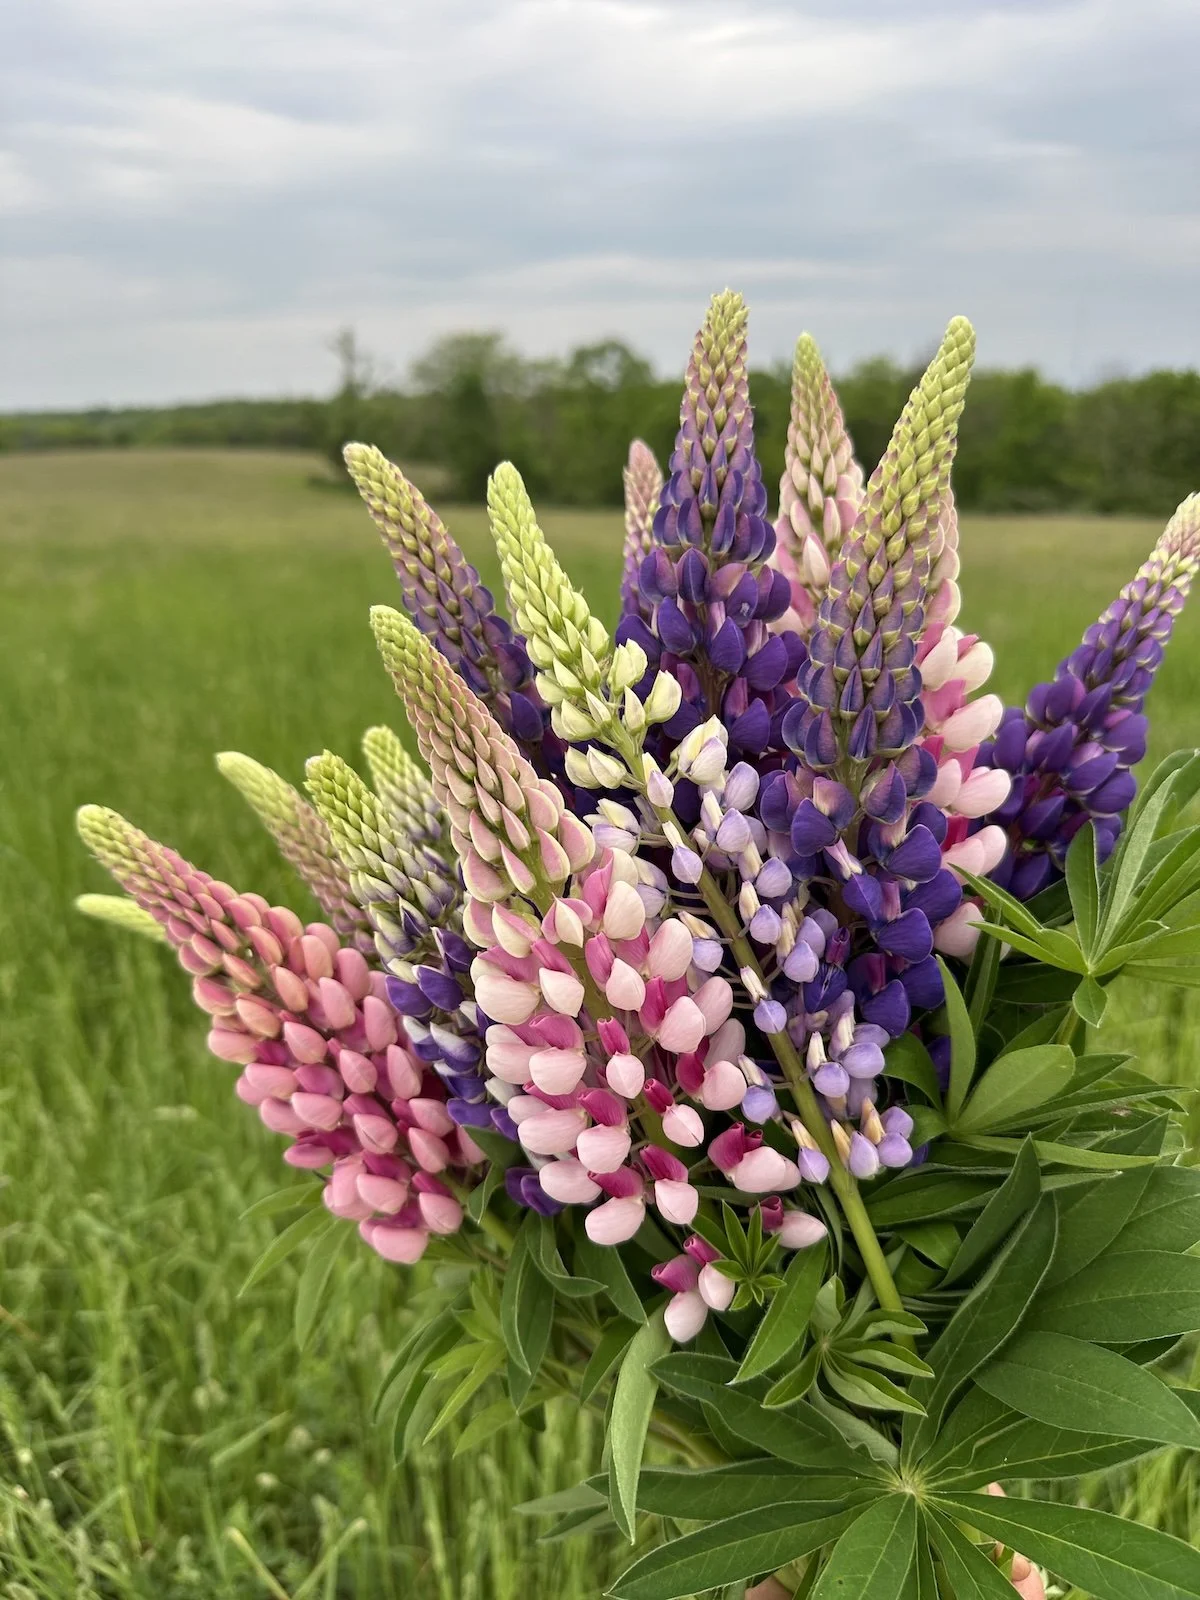
How to Grow Lupine From Seed: A Step-by-Step Guide
Lupine is a magical garden bloom that instantly transports you to a meadow in full bloom. With tall spires of color ranging from soft pastels to vibrant purples, pinks, and blues, lupine adds structure, pollinator value, and a cottage-garden look.
While you can purchase plant starts, growing lupine from seed is surprisingly simple and incredibly rewarding. With just a few easy steps, you can encourage strong germination and enjoy healthy plants for years to come.
Here’s how to successfully grow lupine from seed!
Why Grow Lupine From Seed?
Starting lupine from seed is so easy and it’s a great way to cost effectively include these unique blooms into your garden. Seeds often provide access to a broader range of colors than nursery plants, and they allow gardeners to grow large drifts of lupine in a very cost-effective way. Plants grown from seed also develop strong taproots right from the beginning, which helps them establish well in the garden.
Lupine also offers an added benefit for the soil. As a nitrogen-fixing plant, it naturally helps improve soil health by adding nitrogen back into the ground, which can benefit neighboring plants as well.
When to Plant Lupine Seeds
Lupine seeds can be planted either outdoors or indoors, depending on your gardening preference and climate. We start ours indoors in early spring for zone 5b, around March 1st. Some flower growers will may also sow lupine directly outdoors in early spring once the soil can be worked. Another excellent option is planting seeds in late fall so they can experience natural cold stratification over winter, but you can only do this if you live in a warmer climate, zone 7 and above.
Preparing Lupine Seeds for Germination
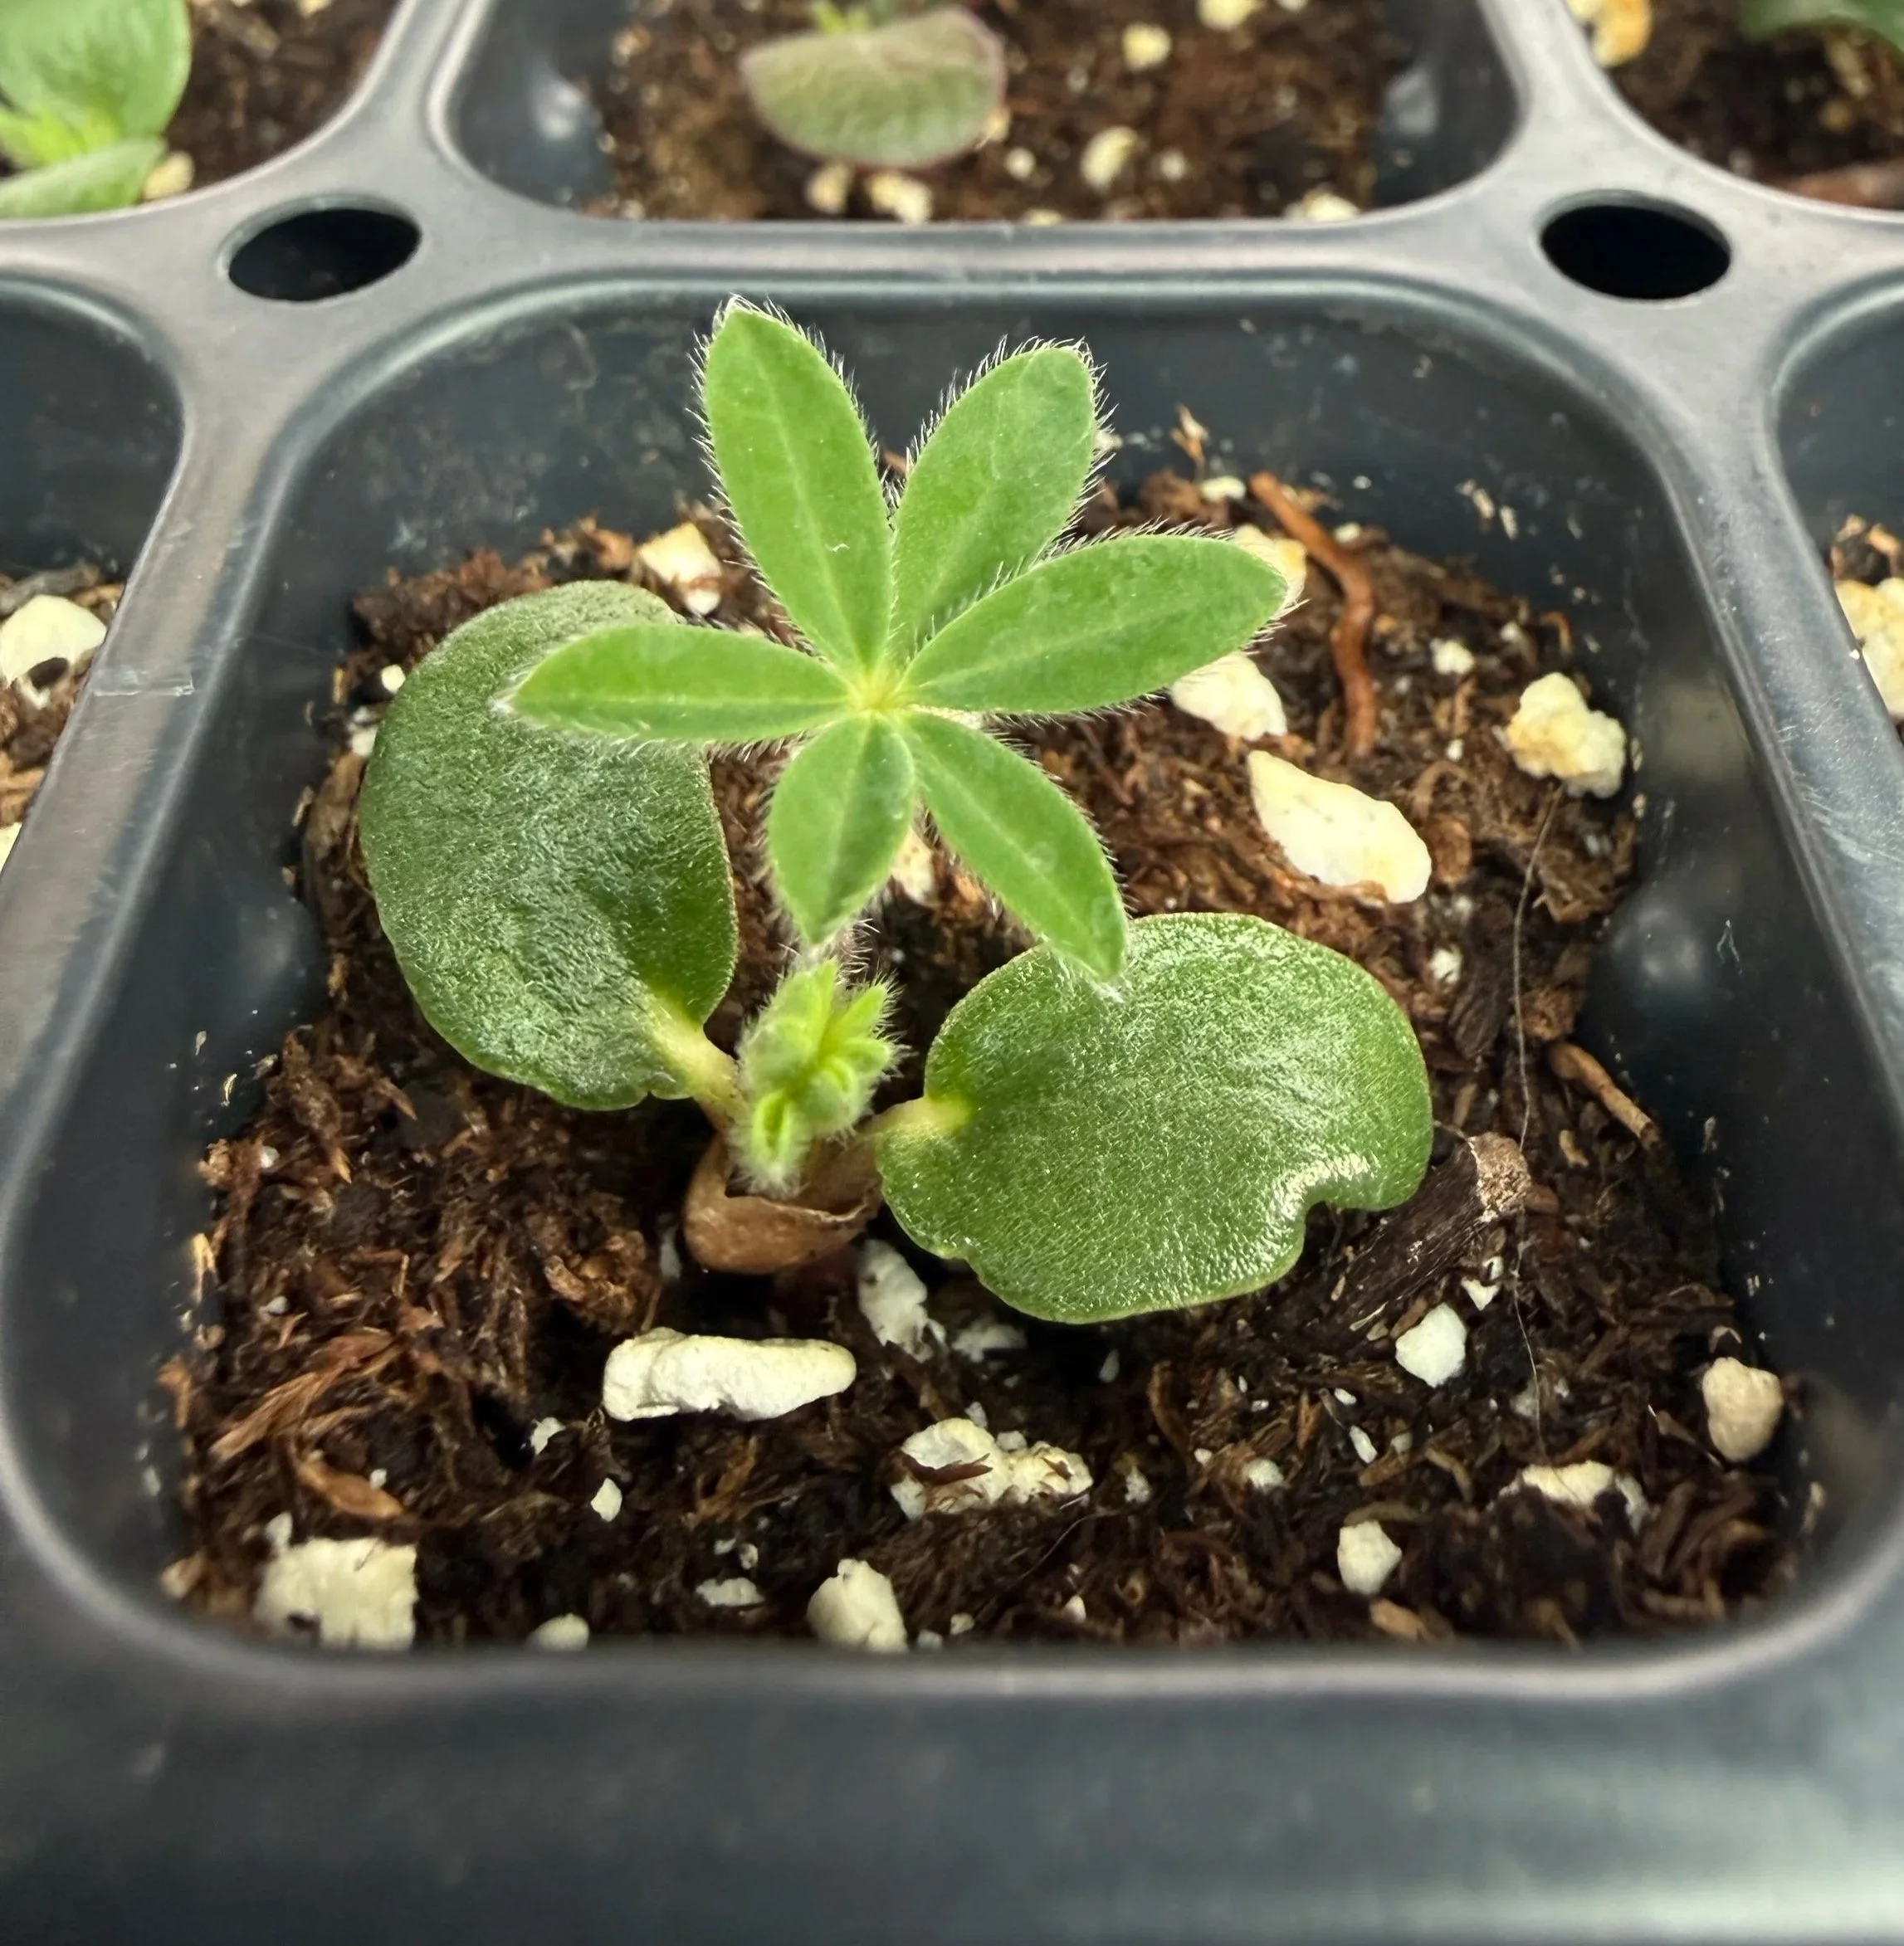
Lupine Seedling
Lupine seeds have a tough outer coating, which can sometimes slow germination. Preparing the seeds before planting helps water penetrate the shell and encourages more consistent sprouting.
One common method is scarification, where the seed coat is gently nicked or lightly rubbed with sandpaper. This allows moisture to reach the interior of the seed more easily. Instead of scarification, we typically will soak the seeds in warm water for twelve to twenty-four hours before planting to loosen the outer shell, but either of these methods will significantly improve germination rates.
Planting Lupine Seeds
Lupine plants develop a long taproot, so it’s helpful to give them space to grow properly from the start. Seeds can be planted in pots with well-draining soil or directly in the garden bed.
Plant the seeds about a quarter to half an inch deep and water them gently after planting. If sowing outdoors, space seeds roughly twelve to eighteen inches apart to allow room for mature plants. Keep the soil lightly moist while seeds are germinating, but avoid overly wet conditions.
With the right conditions, germination typically occurs within two to three weeks.
Light and Temperature Needs
Lupine seeds tend to germinate best in cooler temperatures. Conditions between 55 and 65 degrees Fahrenheit are ideal during the germination stage.
Once seedlings emerge, they benefit from bright light and good airflow. If you’re starting them indoors, placing them near a sunny window or under grow lights will help them develop strong stems and healthy growth.
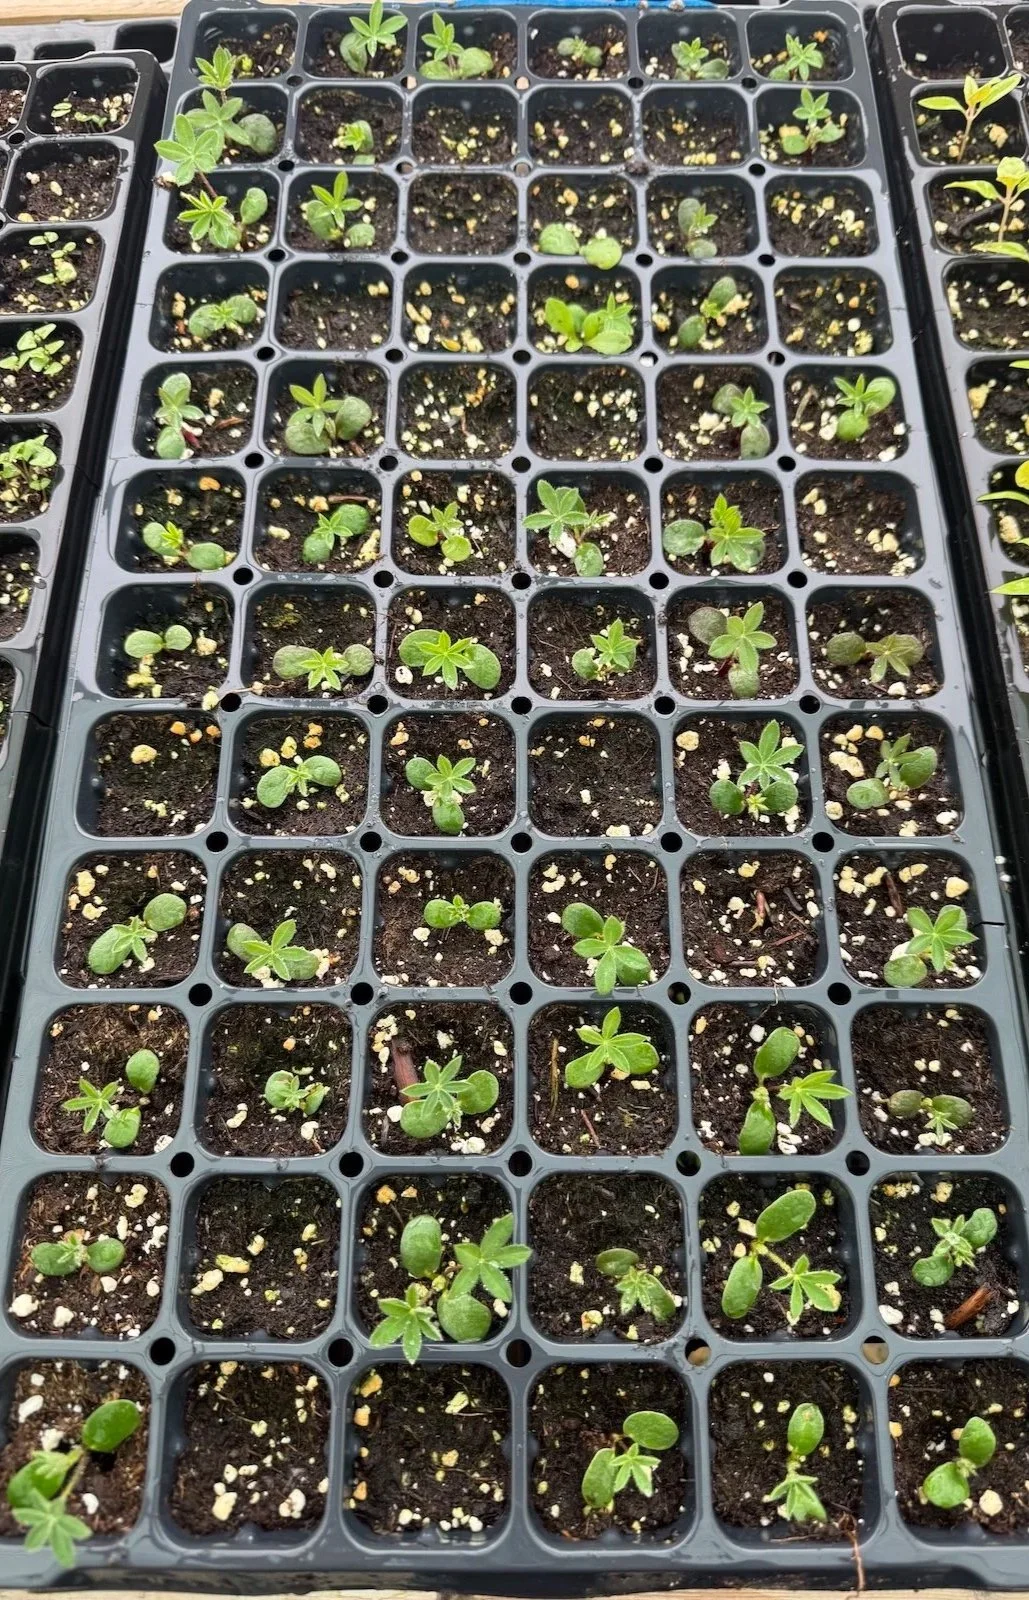
Transplanting Lupine Seedlings
Because of their deep taproot, lupine seedlings prefer minimal root disturbance. If you start seeds indoors, it’s best to use deeper containers so roots have room to develop.
Seedlings are typically ready to transplant once they have two to three sets of true leaves. When moving them into the garden, handle them carefully and try to disturb the roots as little as possible. Choose a location that receives full sun or light afternoon shade.
Soil and Water Requirements
Lupine grows best in soil that drains well and is slightly acidic to neutral. Unlike many garden plants, lupine does not require especially rich soil and actually prefers conditions that aren’t heavily fertilized.
During the establishment stage, consistent watering helps young plants settle in. Once mature, lupine becomes relatively drought tolerant. The most important thing is to avoid soggy soil, which can lead to root rot.
Pollinators Love Lupine
Beyond its beauty, lupine is a wonderful plant for pollinators. Bees, butterflies, and other beneficial insects are naturally drawn to the nectar-rich blooms.
Planting lupine alongside other cottage-garden favorites creates a vibrant habitat that supports pollinators throughout the growing season.
Whether planted in garden beds, woven into a cutting garden, or naturalized through a meadow planting, lupine brings height, color, and a touch of wild beauty to the landscape.
Growing it from seed takes a little longer than the instant gratification of starting from an established plant, but once those tall flower spikes appear, the reward is well worth the wait!
How to Water Lisianthus Seedlings
Lisianthus seedlings require careful watering to prevent root rot and encourage strong growth. Here’s the simple bottom-watering method we use at PepperHarrow Farm to keep lisianthus plugs healthy and thriving.
Lisianthus is a gorgeous bloom that just needs a little extra TLC. We start many of our plants from seed, but some arrive as tiny plant babies called plugs.
To keep them hydrated and healthy, we use a simple bottom-watering method that encourages strong root development. It’s easy, effective, and works whether you’re growing a few trays in your garden or hundreds for a cutting field.
I recently shared a video across our social channels showing exactly how I water our lisianthus seedlings. Below is the same process we use here on the farm.
Lisianthus seedlings behave a bit differently than many other flowers. Early on they grow slowly, which means they don’t use water very quickly. If the soil stays constantly wet, it can lead to stalled growth or root rot. They also prefer to keep their foliage dry, since wet leaves and crowns can increase the risk of fungal disease. Because of this, we’ve found bottom watering to be the best approach.
When it’s time to water, I fill a wheelbarrow with about five gallons of water and add half a cup of fish fertilizer. The fish fertilizer provides a gentle nutrient boost while the seedlings are developing their root systems.
Next, I submerge the tray of lisianthus plugs into the wheelbarrow, making sure each cell gets submerged so the soil can absorb water from the bottom. The trays only stay in the water long enough for the cells to fully saturate.
Once they’re done soaking, the trays go onto a shelf to drain completely. From there, we allow the soil to dry out before watering again.
That wet-dry cycle is one of the keys to growing strong lisianthus. Allowing the trays to dry between waterings encourages healthy root growth and helps prevent disease.
Lisianthus seedlings sometimes get a reputation for being difficult, but in many cases success simply comes down to watering. Using this simple submersion method keeps the roots happy, and the plants growing strong.
Happy growing!
XX Jenn
The Seasonally Inspired Scents of PepperHarrow Candles
With summer evenings quickly ending, and fall evenings just around the corner, now is the perfect time to refresh your candle collection! Our popular summer candles are bursting with scents like citrus, baked lemon goods, watermelon margs, and of course lavender goodness, all handcrafted to keep you in the summer spirit year long. Here’s a rundown of what’s in right now, and what might be on its way soon!
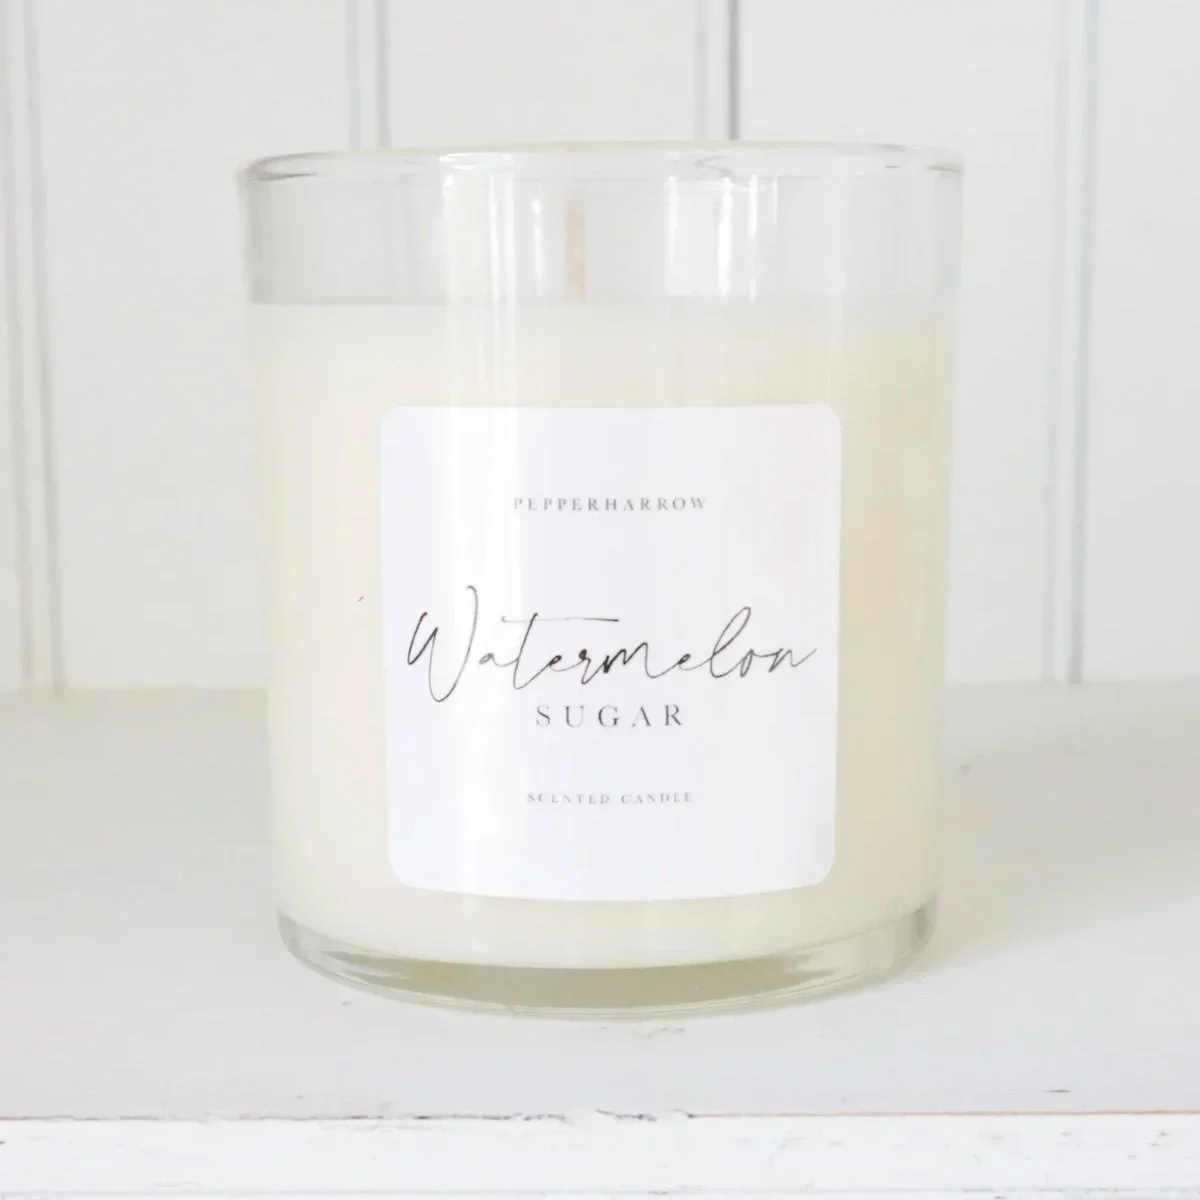
Watermelon Sugar
Our Watermelon Sugar Candle is the perfect fragrance to celebrate the joys of summer! This candle is invigorating and refreshing with its juicy watermelon and hint of sweet sugar, and creates an atmosphere that’s both uplifting and calming. Watermelon Sugar will fill your space with a blend of fruity freshness and subtle sweetness, perfect for any summer gathering, afternoons on the porch, or simply bringing a touch of sunshine indoors.
Lemon Crème
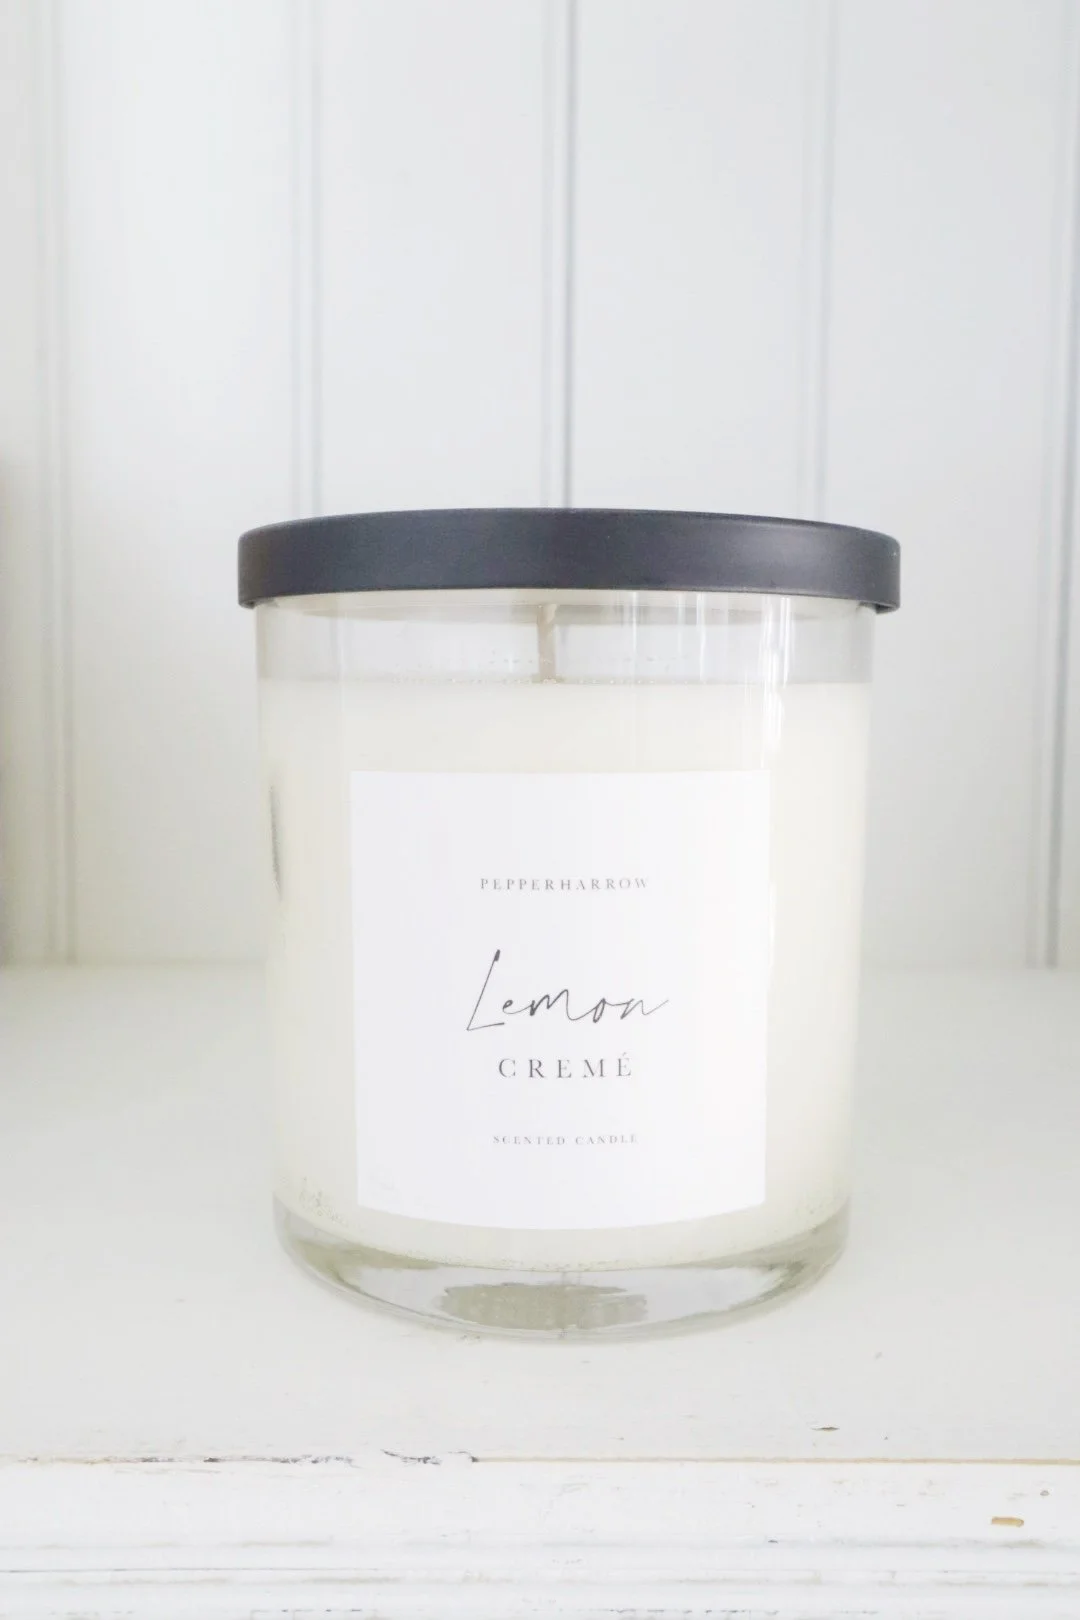
Bright, creamy, and irresistibly smooth, our Lemon Crème candle is a fresh twist on a citrus classic. The uplifting zest of lemon is softened with sweet cream and hints of velvety vanilla, creating a fragrance that feels both refreshing and indulgent.
As it burns, the scent brings to mind a sunlit patisserie filled with lemon custards and delicate confections. Hand-poured on the farm with premium soy wax and a natural cotton wick, it offers a clean, even burn and a warm glow that adds a little sunshine and sweetness to any room.
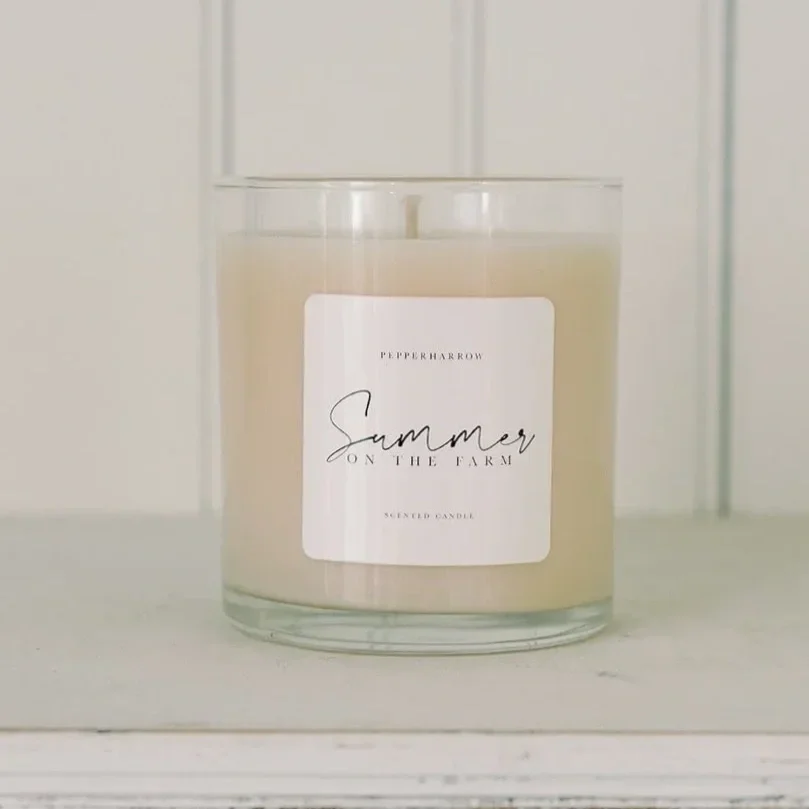
Summer on The Farm
Summer on the Farm is another best-seller known for its mint and clementine fragrance that easily transports you to a summer’s day in the countryside. As you light this candle, the harmonious blend of these two fragrances will create an ambiance that is both energizing and calming, evoking memories of leisurely strolls through a lush farm garden under the warm sun. Whether you're seeking a moment of relaxation, an invigorating burst of freshness, or simply a touch of nature's charm, this candle is the perfect choice for you.
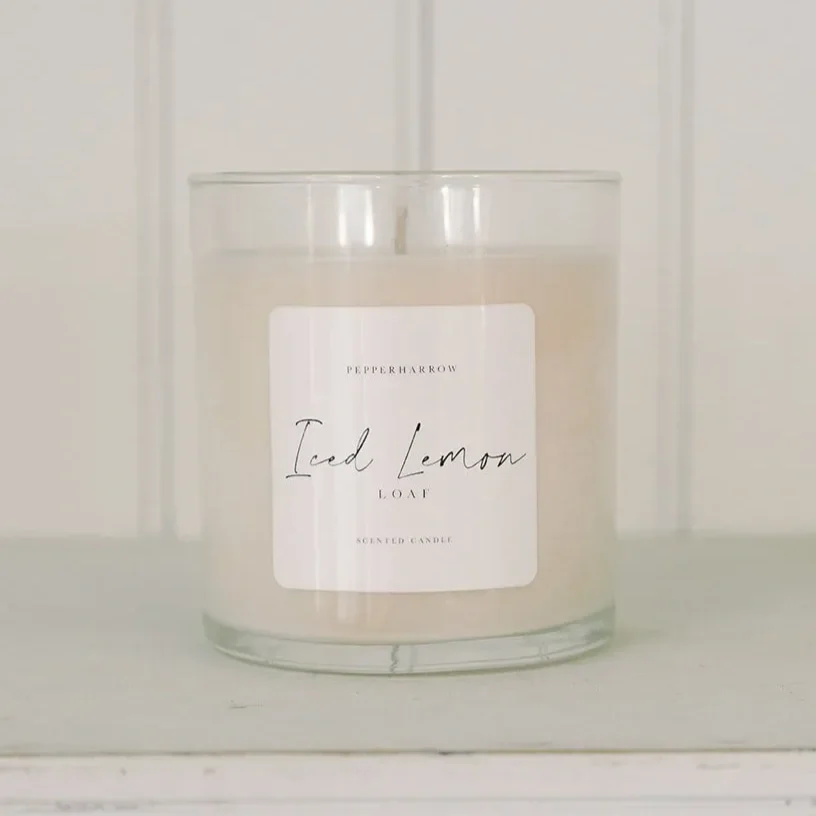
Iced Lemon Loaf
Our yummy Iced Lemon Loaf Candle is a treat for your senses with its zesty lemon and buttery cake base. When you light this candle, the air fills with the comforting scent of lemon-infused batter and easily transports you to a bustling bakery on a sunny morning.
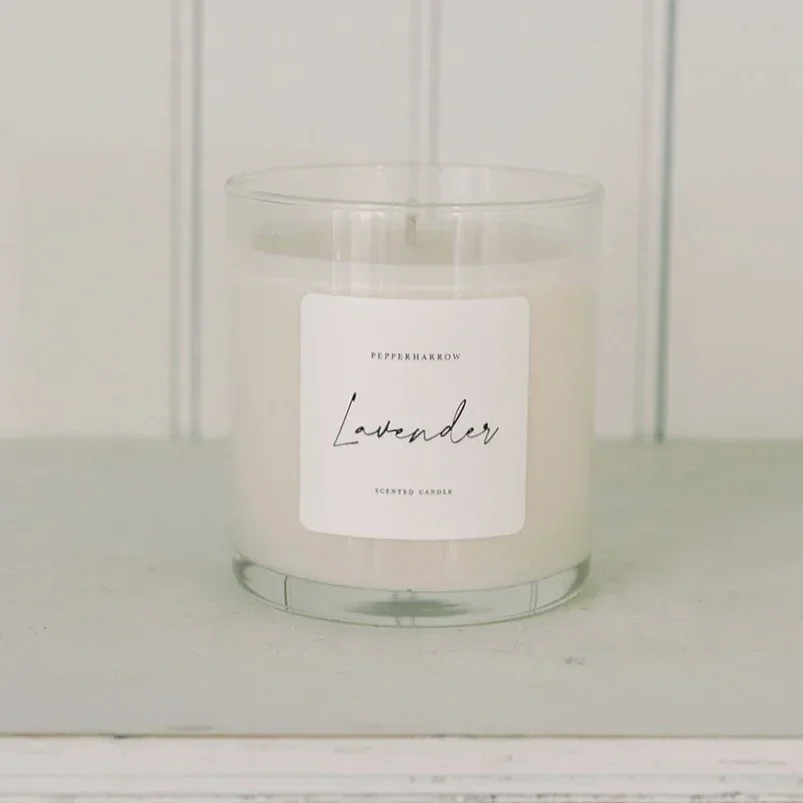
Lavender
Of course, you can’t go wrong with our classic Lavender Candle. This candle is hand-poured using our lavender essential oil which will gently float through your home every time it’s lit. Lavender has wonderful aromatherapy properties like stress relief and relaxation which makes it perfect for a cozy night in or a much-needed moment of calm, leaving both you and your space feeling refreshed.
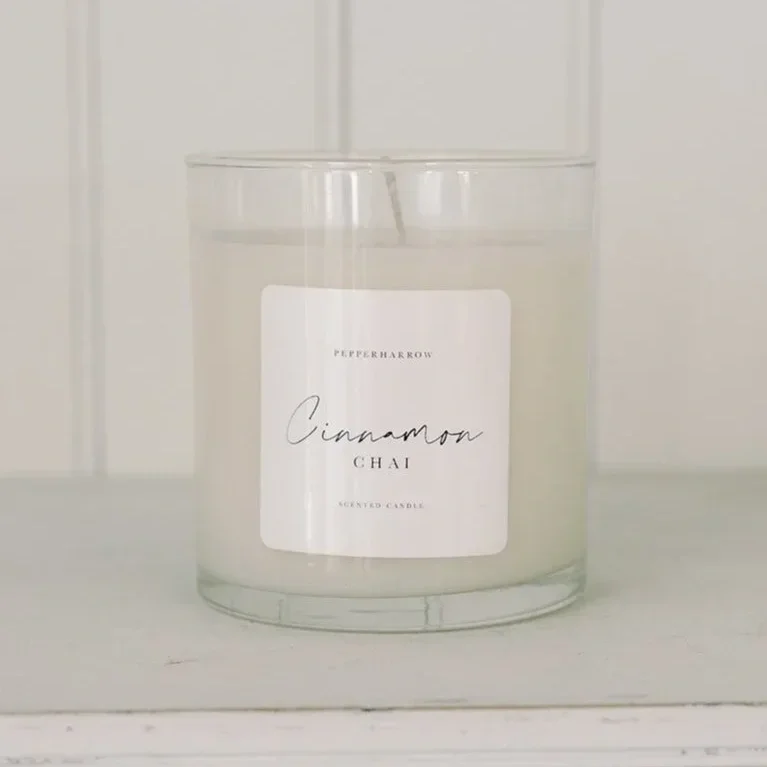
Cinnamon Chai
Our Cinnamon Chai Candle is a sensory delight that brings warmth and comfort to your home. This stunning candle captures the aromatic essence of spiced chai tea infused with a hint of cinnamon, creating a cozy and inviting atmosphere. It’s the perfect candle for the transition from summer nights to fall evenings.
Our candles are all hand poured with high quality, natural soy wax, ensuring a clean and even burn that lasts for hours. The natural cotton wick adds a touch of coziness to your space. They all come in a pretty 8.5oz glass container, with a few select fragrances available in a 16oz size.
Stay tuned for even more summer vibes as we get ready to drop a few new candle scents for y’all soon. But for now, take in the rest of the summer days and let our candles be a stunning addition to your space.
XX Jenn and Adam
How to Grow Lavender in Iowa
Lavender isn't supposed to thrive in Iowa's clay soil and brutal winters, but we've been growing it for over a decade. Here's what every Iowa gardener should know before putting a single plant in the ground.
Growing lavender in Iowa sounds like it shouldn't work. The soil is too rich. The winters plunge well below zero. The summers swing between intense heat and suffocating humidity. And yet, here at PepperHarrow Farm in Winterset, we've been growing lavender successfully for over a decade in Zone 5b, central Iowa, cultivated over 18,000 plants across more than 14 acres. It took years of trial, error, and many painful losses to learn what this climate demands. We won't pretend we can fit a decade of hard-won knowledge into a single blog post, but we can share the foundational lessons that every Iowa gardener should understand before putting a single plant in the ground.

Why Lavender Struggles in Iowa (and Why It Can Still Thrive)
Lavender is native to the Mediterranean coast, where summers are hot and dry, winters are mild, and the rocky, alkaline soil drains fast. Iowa offers almost the opposite on paper. Our clay soils retain water like a sponge. Our winters regularly dip to negative temperatures and our summers can feel like a steam room from late June through August.
Here is the most important thing we can tell you: the number one killer of lavender in Iowa is not cold. It's moisture. Specifically, it's moisture trapped around the roots during winter freeze-thaw cycles. When the soil stays wet and temperatures bounce above and below freezing, the crown and roots rot. That single fact should shape every growing decision you make.
The good news is that Iowa does get reliable sun, and with the right variety selection, soil preparation, and winter care, lavender can absolutely thrive here. We've watched plants survive stretches of negative 15 degrees on our farm when the fundamentals were in place.

Spring Lavender
Our lavender usually starts to ‘wake up’ around mid May, sending out green shoots, or growing back from the base of the plant.
Choosing the Right Varieties: Not All Lavender Is Created Equal
Variety selection is where many Iowa growers fail before they even start. Walk into a big box store in May and you'll find gorgeous French and Spanish lavender on the shelf. They look incredible. They will also be dead by February. Those varieties are only hardy to Zone 8 and simply cannot survive our winters outdoors.
What does work in Iowa? English lavender (Lavandula angustifolia) and select hybrid cultivars (Lavandula x intermedia) are your foundation. Within those species, specific cultivars matter. Some handle our humidity better than others. Some hold up to our freeze-thaw cycles more reliably. Some produce better blooms in our shorter growing window.
We've tested dozens of cultivars over the years on our farm. A few names to start your research: Munstead and Hidcote are widely recognized as cold hardy performers, and Phenomenal has earned a strong reputation for disease resistance in humid climates. But knowing which variety to buy is only the beginning. How you plant it, where you place it, and how you prepare your soil will determine whether it actually survives.
We cover variety selection and placement strategy in depth in our online Lavender Masterclass, where you can see how each cultivar performs in real Iowa growing conditions, side by side, in our fields.
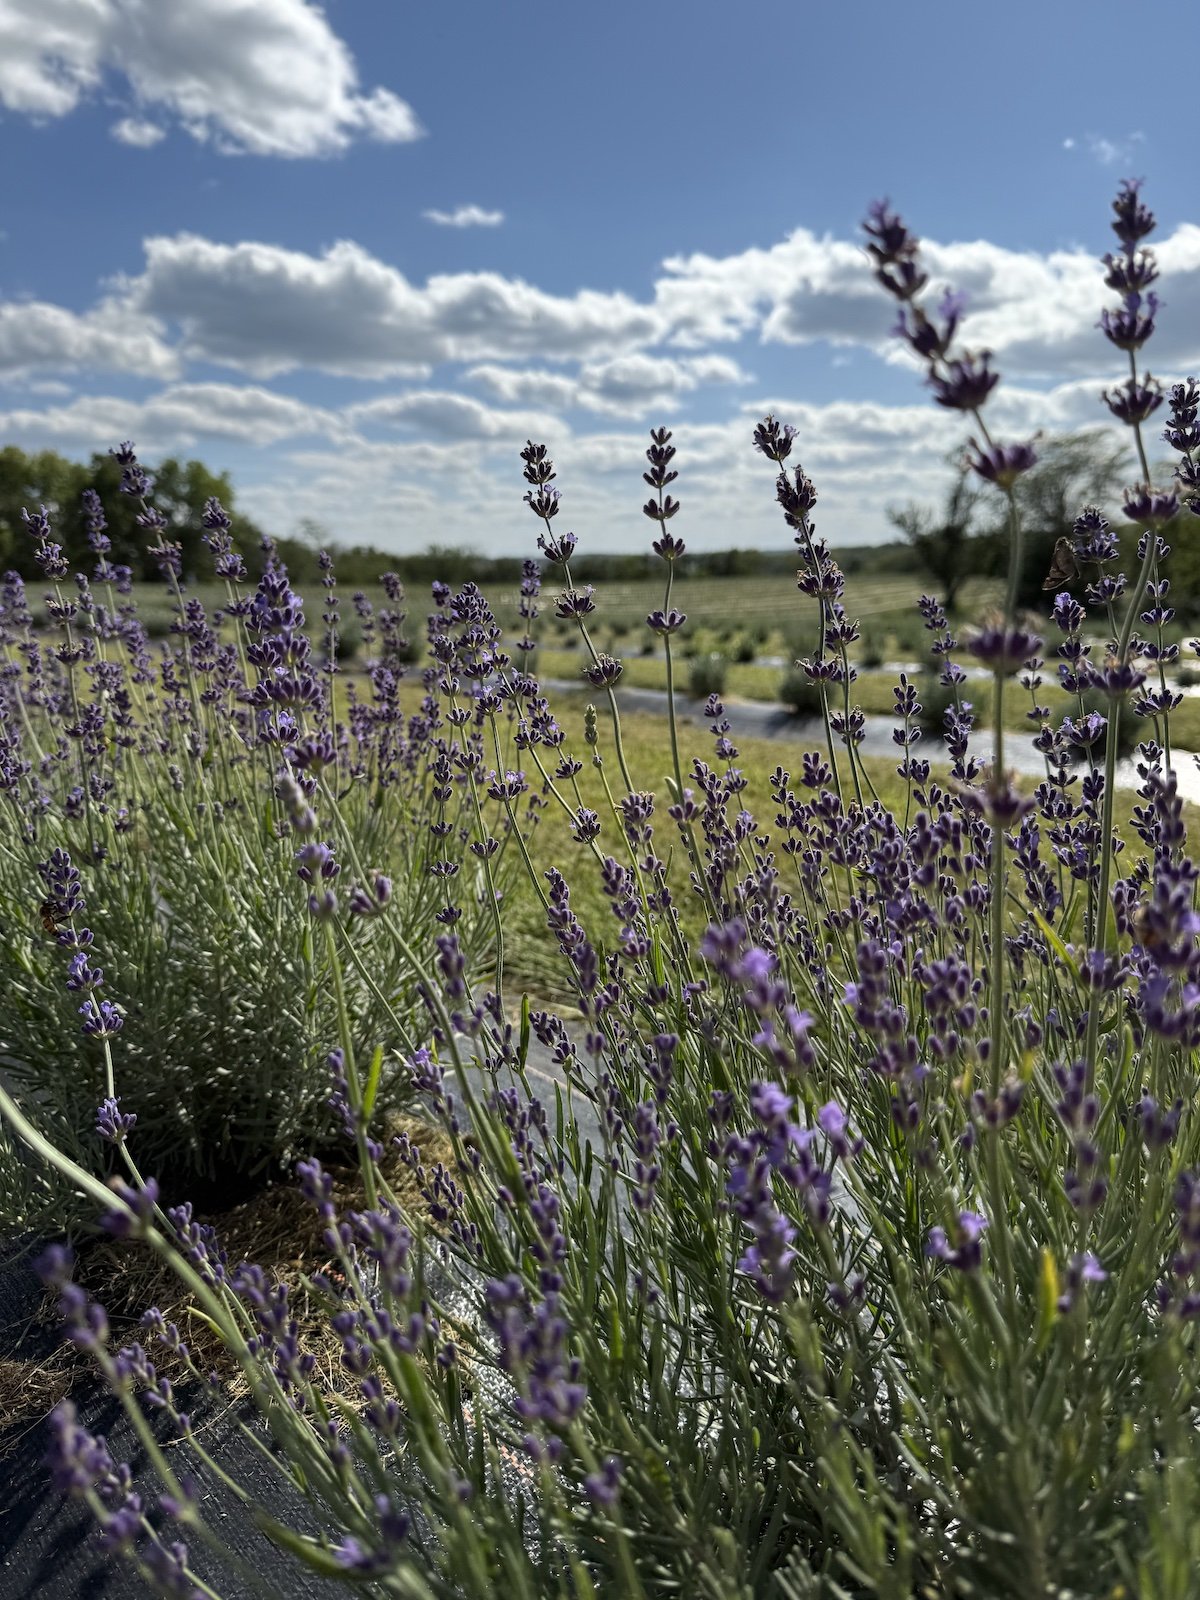
Lavender Varieties
We grow over size different varieties of Lavender and continually experiment with new varieties. Hidcote is the variety shown here. A very reliable lavender for growing in Iowa.
The Challenge Every Iowa Grower Must Solve-The Soil
If you take one thing away from this post, let it be this: drainage is everything. Lavender roots sitting in wet soil will rot, and Iowa's heavy clay makes that a constant threat.
The principle is straightforward. Lavender wants soil that drains fast, stays on the lean side nutritionally, and trends slightly alkaline (a pH between 6.5 and 8.0). Iowa's native clay soil does none of those things naturally. That means you need to actively engineer your planting environment. You're not just digging a hole and dropping in a plant, you're building a micro-habitat.
There are several approaches to solving this, from amending in place to building raised beds to installing gravel underlayers. Each has tradeoffs depending on your scale, your existing soil composition, and your budget. What we'll say is this: don't underestimate this step, and don't skip soil testing. Many gardeners invest in beautiful plants and then lose them because they treated soil prep as an afterthought.
The specific soil amendment ratios and bed construction methods we use at PepperHarrow are techniques we've refined over many growing seasons. We share our full approach in our online lavender growing course.

Planting, Timing and Spacing
Two principles to keep in mind for Iowa:
Plant in late spring. In central Iowa, that typically means mid-May after the last frost risk has passed. Planting too early, when spring weather is still swinging between 70 and 30 degree days, stresses young plants and invites root rot before they've established.
On the otherhand, don’t plant too late. We recommend planting not any later than July 1st. Beyond that time, you risk losing your plants over the winter. They need plenty of time to establish before the harsh, cold weather sets in.
Give your plants room to breathe. This is one of the most common mistakes we see. It's tempting to plant close together for a fuller look right away, but in Iowa's humid summers, air circulation is your best defense against fungal disease. Crowded plants trap moisture in the canopy, and moisture is the enemy. We space our plants generously. The specific spacing depends on the cultivar and the layout, but we like to keep an average of two feet per plant.

Lavender Self-Care Products
All of the lavender we harvest from our fields is distilled by hand, right at the farm. The harvested lavender buds are steam-distilled into essential oil, and used to make natural beauty and self-care products, such as our popular lavender body oil.
Seasonal Care - The Approach for the Midwest
Caring for lavender in Iowa is not the same as caring for it in Oregon or Provence. Our climate demands a different strategy.
A few principles that guide our seasonal approach:
Water less than you think. Overwatering is far more dangerous than underwatering for lavender in Iowa. Once plants are established, they are remarkably drought tolerant. If the leaves start yellowing, that's almost always a sign of too much moisture, not too little.
Feed sparingly. Lavender prefers lean, nutrient-poor soil. Rich Iowa garden soil and heavy fertilizer programs actually work against you here, encouraging soft growth that's more vulnerable to winter damage.
Summer humidity is your toughest season. July and August in central Iowa test every lavender plant. Good airflow, proper spacing, and your approach to mulching all play a role in getting through these months. This is where your soil prep and variety selection either pay off or catch up with you.
The nuances of our seasonal care calendar, from exactly when we shift watering patterns to how we manage mulch through Iowa's unpredictable shoulder seasons, are topics we go deep on during our farm workshops. There's a rhythm to it that's easier to show than to write about.

Winterizing: Where Most Iowa Growers Lose Their Plants
Winter care is the make-or-break season for Iowa lavender. Get this wrong and everything else you did right won't matter.
The key principles:
Do not prune in fall. This is critical. Fall pruning encourages tender new growth that will be killed by winter cold. Save all pruning for spring. We know it's tempting to tidy things up in October. Resist that urge.
Dry conditions going into winter matter more than you realize. As plants go dormant, they need to be dry. The combination of wet soil and freezing temperatures is what causes root rot and crown damage.

Lavender Field at PepperHarrow
Snow is your friend. A consistent blanket of snow is actually one of the best natural insulators.
We've lost plants to winter. Every lavender grower in Iowa has. The difference between occasional losses and losing entire plantings comes down to a winterization approach tuned to your specific site conditions. It took us several seasons to dial in our method. In our workshops and online course, we walk through the full winterization process step by step, including the adjustments we've made after especially brutal winters.
Pruning Lavender Plants
Proper pruning is one of the most underrated skills in lavender growing. Done well, it keeps plants productive and healthy for many years. Done poorly (or not at all), plants become woody, leggy, and stop flowering.
The golden rules: prune in spring (not fall), never cut into old bare wood (it won't regenerate), and shape for airflow. The timing, angle, and extent of each cut matter, and they vary by cultivar and plant age. This is honestly one of those skills that's best learned hands-on, which is why we include live pruning demonstrations in our spring workshops.
Harvesting Lavender

Bundle of Harvested Lavender
Most English lavender varieties will begin blooming in mid-June in central Iowa, with peak harvest in late June through early July. The timing of your cut affects the fragrance, oil content, color retention, and vase life of the stems. We harvest thousands of stems each season for our handmade products, dried arrangements, and farm shop, and the precision of that timing is something we've fine-tuned over many harvests.
If you're growing at home, a good starting point: harvest when buds are showing color but before they fully open. That's when the essential oil concentration tends to be highest. Cut stems long, bundle them, and hang them upside down in a dark space with good airflow.
Come See What's Possible
If you'd like to see thriving lavender in Iowa with your own eyes, we'd love to welcome you to PepperHarrow Farm in Winterset for our annual Lavender Festival. Our 60-acre farm in Madison County is home to over 18,000 lavender plants, acres of seasonal cut flowers, a bespoke farm shop full of handmade lavender products, and experiences ranging from floral workshops to al fresco style farm dinners to glamping stays.
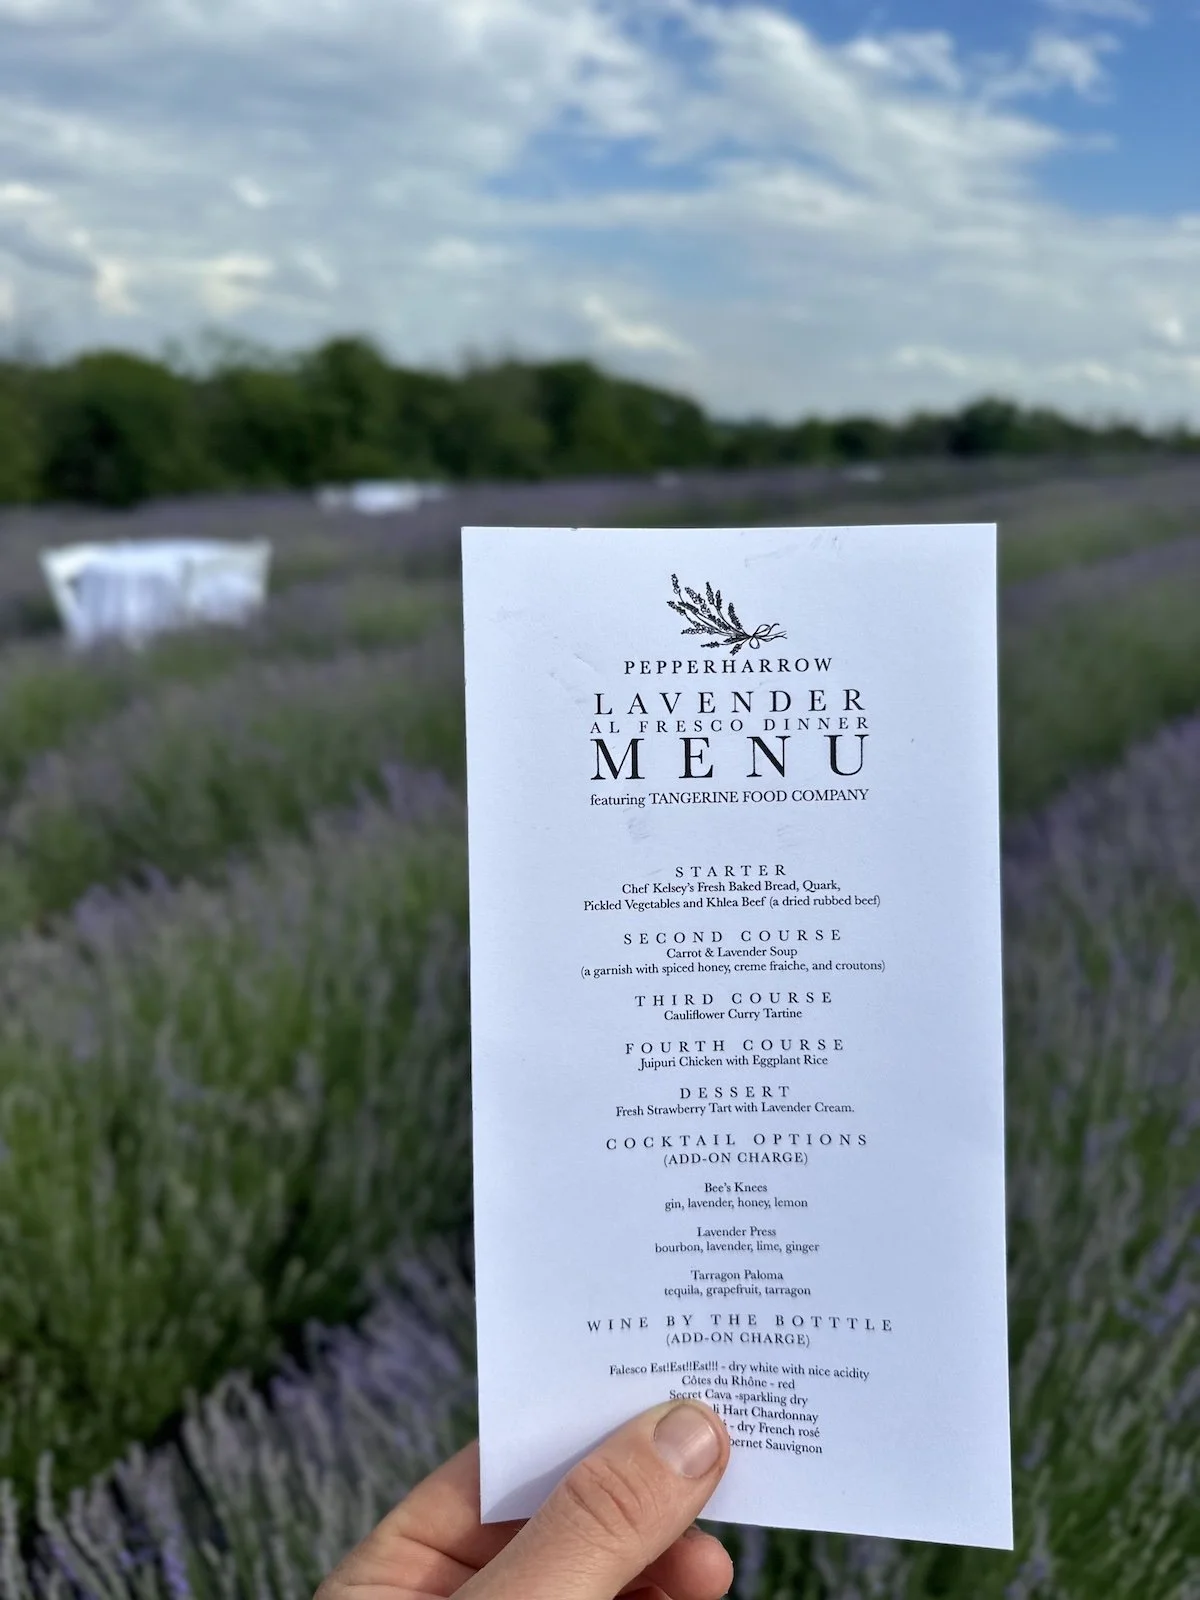
Lavender Al Fresco Dinner
Guests love to visit the farm to see the lavender in bloom, especially when it’s paired with excellent food and a truly unique experience. The Lavender Al Fresco Dinner is held once a year at the farm, typically in mid-June when the lavender reaches its peak bloom and the fields are at their most fragrant and picturesque.
For those who want to go deeper:
Our on-farm lavender workshops cover variety selection, soil preparation, planting technique, seasonal care, winterization, pruning, and harvesting with hands-on instruction in our fields. View upcoming workshops
Our online lavender growing course brings that knowledge to growers who can't visit in person, with detailed lessons drawn from over a decade of growing in Iowa's challenging conditions. Learn more
Our Bloom Membership keeps you connected to the farm throughout the growing season, with bouquet pickups, behind-the-scenes access, and early invitations to events and limited releases. Explore membership
We also sell a full line of farm-made lavender products, from salves and soaps to candles and sachets, all made with lavender grown and harvested right here in Winterset.
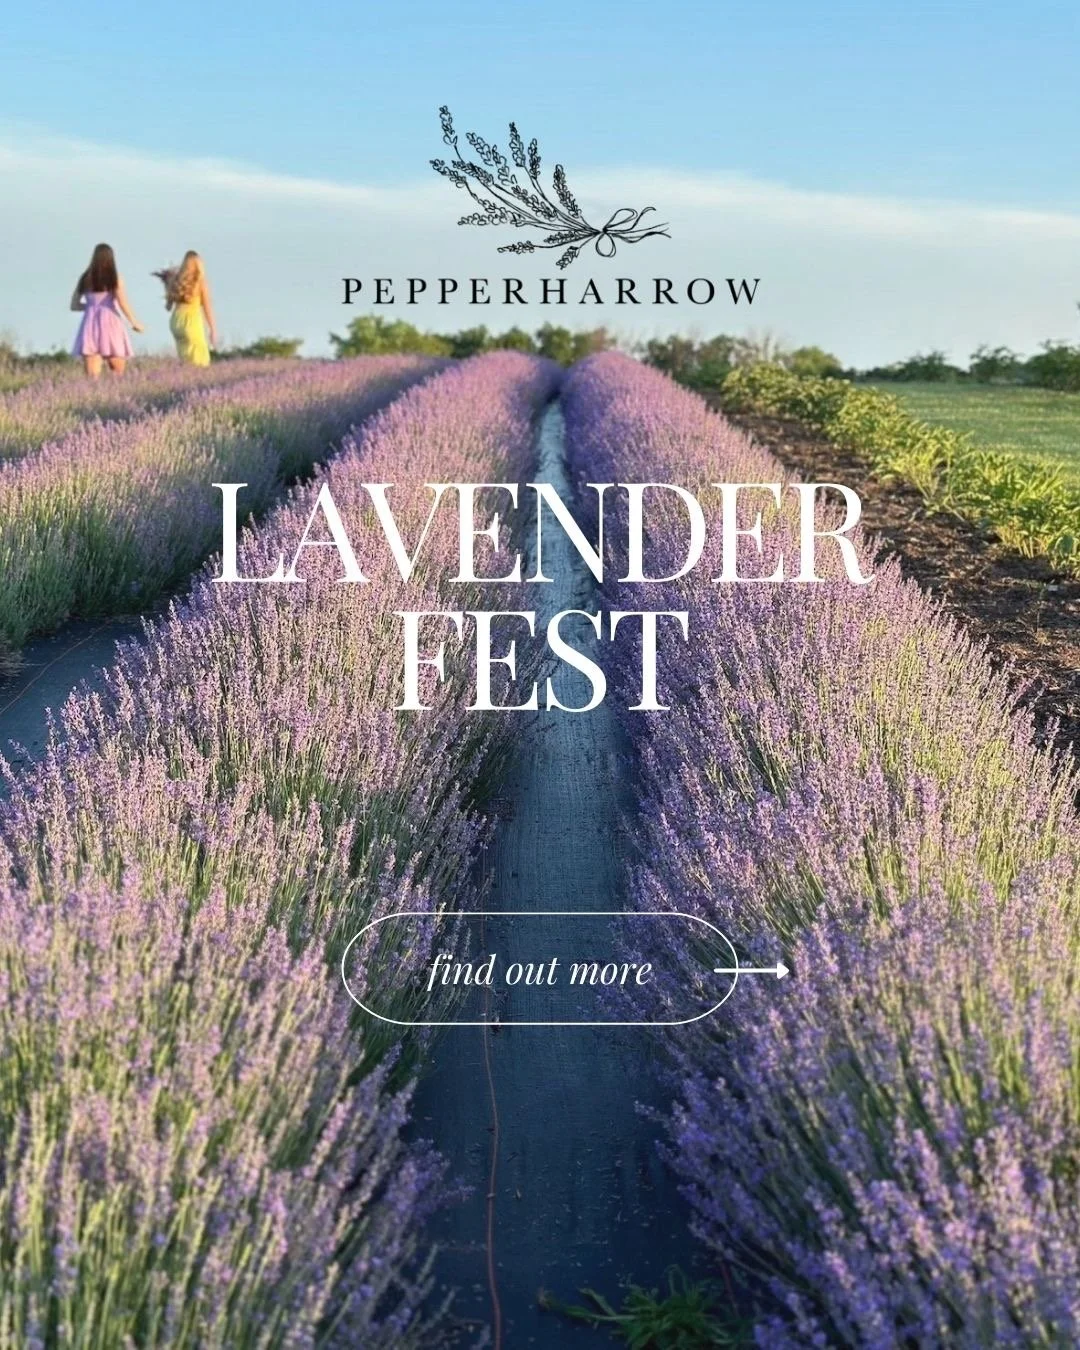
Lavender Festival
Held once each June, the Lavender Festival at PepperHarrow is a celebration of lavender in full bloom. At the height of the season, the fields turn a breathtaking shade of purple, an unforgettable sight that invites you to slow down, breathe deeply, and soak in the beauty of the farm!
Guests are invited to experience the farm in a hands-on, meaningful way. Stroll the fields, enjoy guided farm tours, and learn from live lavender demonstrations ranging from baking and culinary uses to cocktail crafting and distillation. Capture stunning photos among the blooms, then harvest your own fragrant bouquet to take home.
Growing lavender in Iowa is absolutely possible. It just takes a little patience, and a willingness to do things differently than the generic advice suggests. We hope this post gives you a few tips, and a starting point, and we'd love to help you take the next step!
XX Jenn and Adam